This is a tricky one to describe, so bear with me..
I really didn't know where to start ripping out the rotten/eaten band joists and potentially (eventually) sill. The ledger for the deck is bolted through the sheathing and band joists, making this a tough one. Maybe the only thing to have saved me is that the ledger sits on 3/4" standoffs made of wood.
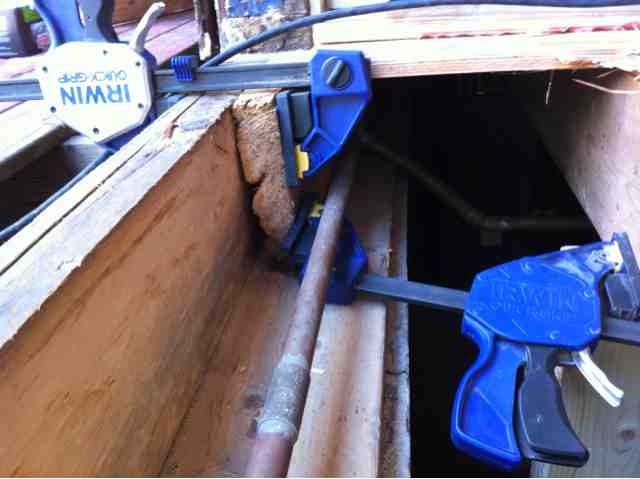
They can be seen here as we see, from left to right, decking, deck joists (more substantial than the house!), ledger, standoffs, 5/8" sheathing, 2x8band joist, what I am calling its "sister," and then the sill, with a 3/4" copper water line to complicate things.


I smacked myself and immediately made one just to the left when I realized what it meant physically that the ledger broke in the middle...
Having some unusual presence of mind last night, I doubled back after picking up a few demo blades for my sawzall to grab a metal blade. This was the ticket to getting the standoffs out of the way once the lags were undone. Sorry folks action shots can only happen after normal preschool hours!
(I found a second vacuum hose to be great in re-directing the shop vac exhaust into the basement!)

This was the view after removing what was left of the sheathing, and trimming back the two band joists and the main sill to a point well past the rot, in a staggered fashion:

Seeing that the sister joist was a short section, I ended up just taking it out. It is clear by the haggard sawzall cuts that someone has done this repair before. Rest assured, there is plenty of other evidence that it occurred, but no evidence that it was done correctly, or with any attention to what actually caused the problem in the first place...
Here is the possibly original sister as it returns to the corner, never having been fastened down to the sill, and having been pushed out by frass from our carpenter ant population. It is stressing the copper as it turns to go up to the baseboard radiator just in the shadow if this photo:

Here is probably 650-700 lbs of force trying to right it after jacking up the beam to the right:
Here's the scene now, with the foundation exposed:

This is the first poured foundation I have seen with a step on the top of the wall To accommodate a 2x4 under the typical sill. No pressure treated sill material was used. Nothing seems to have been bolted down, at least I haven't yet seen evidence during my dig.
Here is my next dilemma:
How to get some sturdy band joist material under this neighboring wall, such that the break in the joist isn't right under the double stud in the wall... I would like to be able to button up the French doors knowing that fresh material extends underneath the wall, rather than digging in under the doors again. This is especially worthwhile as the door casing will be fixed to the double stud before the material underneath is replaced.
Ideally, I could replace the joists along one whole side at a time. Maybe that's the move...

Oh, surprise! It's pouring rain again!

Good thing Sarah suggested I temporarily install our new chimney cap while we wait to have the flue cleaned prior to installing our new liner:

This way, in the meantime, it doesn't pour rain down our flue making the whole house smell like a wet firepit.

Ta ta for now!
1love
Andy
No comments:
Post a Comment